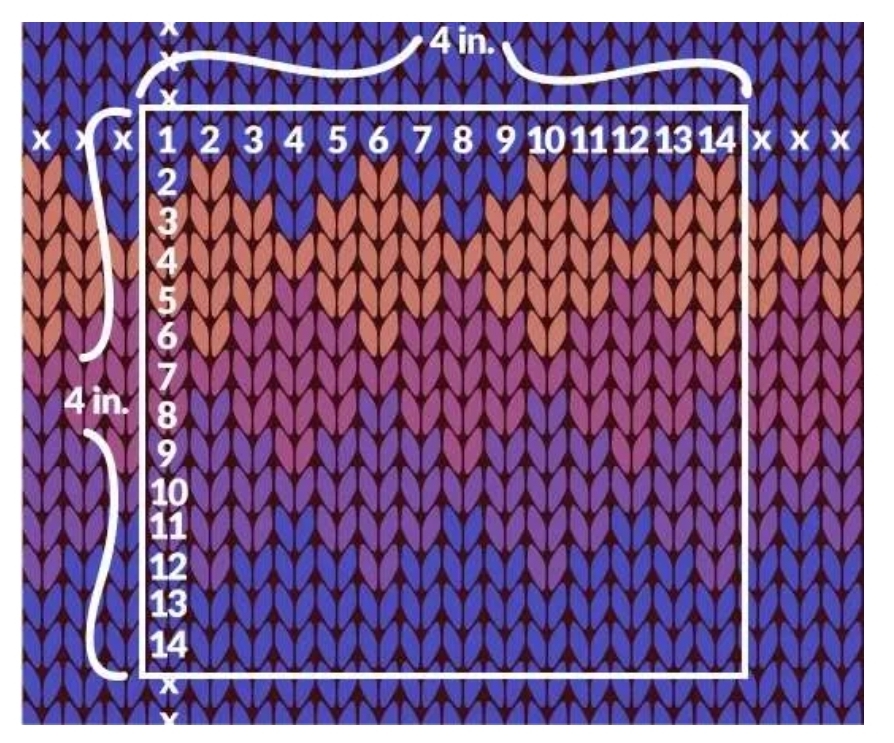
The number one mistake that I see beginner to intermediate knitters/crocheters make is not paying any attention to their gauge on things that require a gauge.
That problem with the fit you’re having? It’s probably your gauge. I say that because it’s roughly 90% of the cases.
My mother is an amazing seamstress. When I was a kid, a lot of my clothing was made by her. Of course, I got roped in to help with the parts she didn’t like to do.
So I came to the wonderful land of yarn with a high level of understanding about garment construction. Seamstresses think in inches. Yarn people think in stitches. Gauge is all about converting those stitches into inches.
Stitch count is WAY too variable to count as a method of measurement. First off, no one knits or crochets with the exact same tension. We all do it a little differently. Secondly, if you change the needle/hook or the yarn, it’s a whole different world.
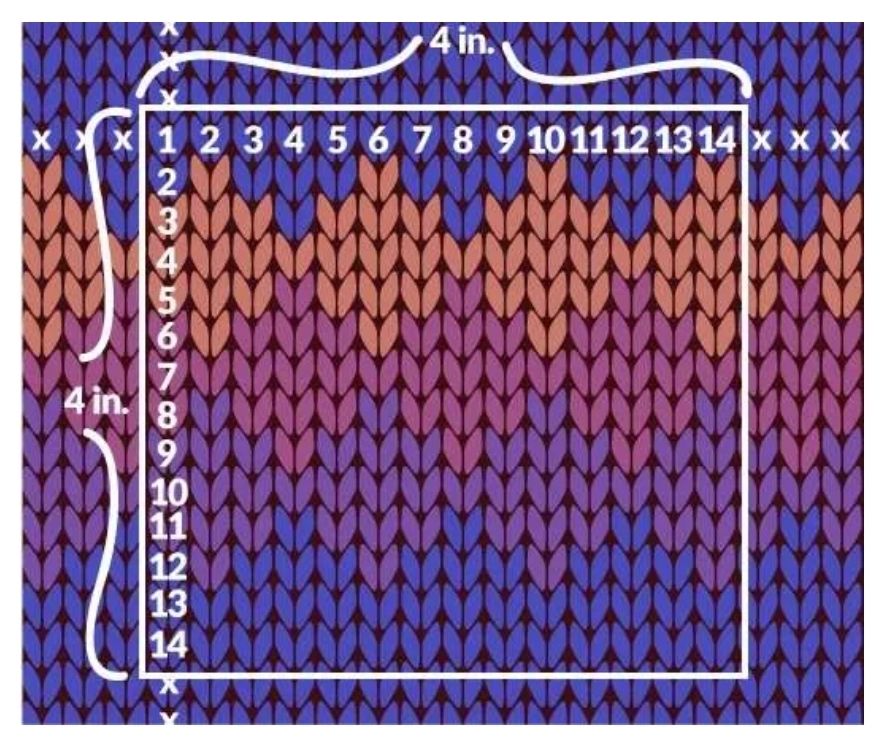
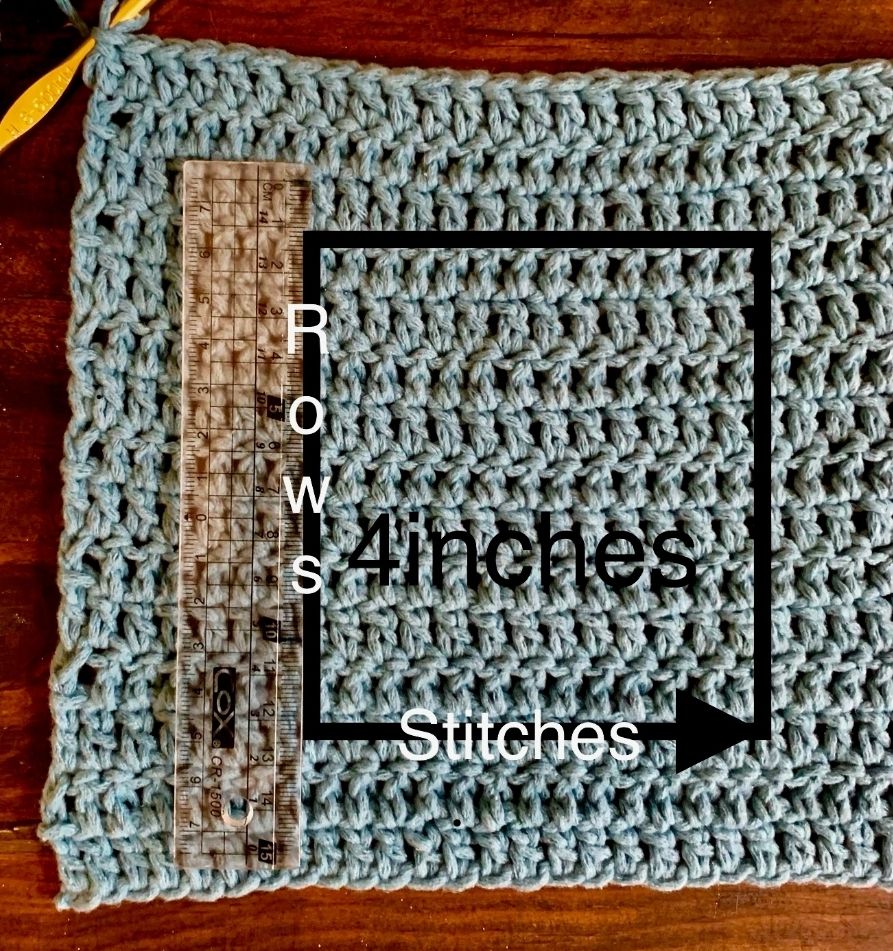
*A gauge swatch is usually 4 inches by 4 inches. It absolutely has to be made with the needles/hook you plan to use and the exact same yarn. And yes, 4 inches. There are no shortcuts. *
Once it’s made, you pull out a ruler and you count. How many stitches are in four inches? How many rows?
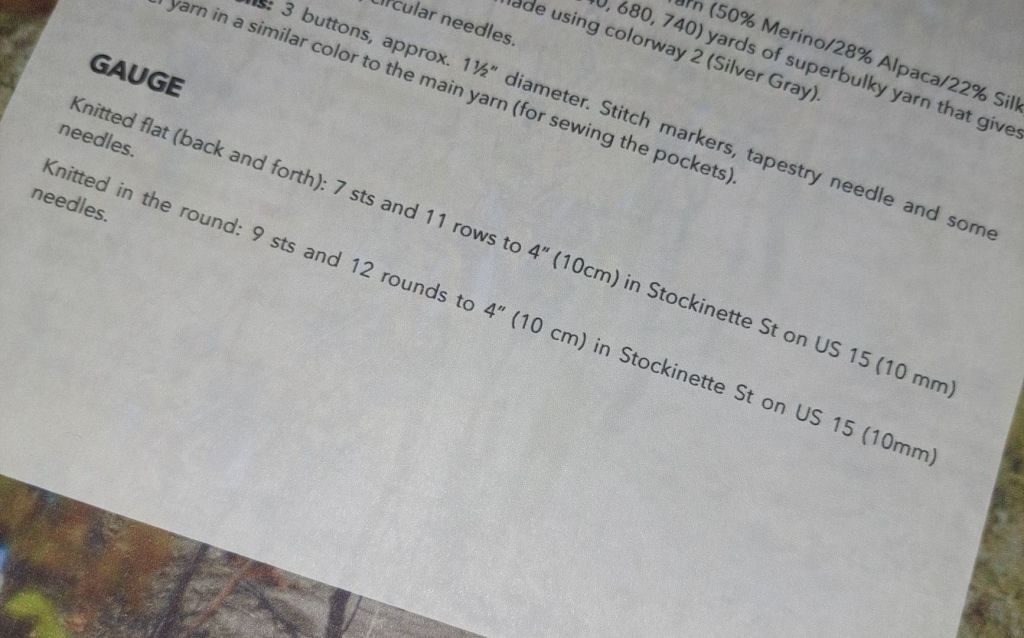
Yes, your pattern probably has a listed gauge. In the photo I attached, it’s got it listed as 7 stitches by 11 rows for a 4 x 4 square in flat. In the round, it’s 9 stitches by 12 rows. I’m going to use the round measurements to get down to the single inch.
9÷4= 2.25 stitches per inch
12÷4= 3 rows per inch
That’s number of stitches divided by number of inches.
So let’s use these numbers and build on them. Let’s say the total length of what I’m making is supposed to be 36 inches. How many rows will that be?
36 x 3 = 108 rows
That’s inches multiplied by number of rows in an inch.
*If your gauge swatch shows you have not enough stitches or rows per inch, you’re working loose. The two big fixes are dropping down a needle/hook size and ramping up your tension some.
*If your gauge swatch shows you have too many stitches/rows per inch, you’re working tight. The two big fixes are (you guessed it) going up in needle/hook size and loosening your tension. Personally, I tend towards this side.
Let’s say your gauge is looser than it needs to be. Let’s work out what that means for the fit. Instead of 2.25 stitches per inch (width), you’re working at 1.75. In the pattern listed above, with the size I’m working on, the widest part of the sweater has 138 stitches.
138 ÷ 2.25 = 61.33 inches around.
138 ÷ 1.75 = 78.85 inches around.
That’s a difference of about seven and a half inches wider than what you want. Now I like a baggier fit, but that’s a bit much. And this is exactly how I know that your fit problem is gauge.
Now let’s take this into the land of pattern alterations so that whatever it is better fits the body it’s intended for.
Here comes more math!
The formula is:
Rise/Run
That’s rise divided by run. Rise is the vertical, run is the horizontal.
We’re going to keep using the same numbers as above. You’ve got a sleeve. You know it needs to be 17 inches before you start your cuff.
17 x 3 = 51 rows in the sleeve. So the rise is 51.
You know the sleeve is 10 inches around at the top, but you want it to be six inches by the time it gets to the cuff. That’s loosing 4 inches.
4 x 2.25 = 9 stitches to lose. That’s the run.
So you’ve got to lose 9 stitches over the course of 51 rows. But when to do it to keep it nice?
51 ÷ 9 = 5.67 rows. So loose one every 5th row, probably starting about row 8 to 10, for fit concerns. You’re decreasing 9 times over the course of 51 rows.
And all of this, gesturing all around, is why, even if you don’t like doing them, gauge swatches help. Understanding the math helps. Converting the stitches into inches helps.
Welcome to the land of yarn math.
Here’s a link to a tool to help you measure your gauge. Here


Leave a Reply